
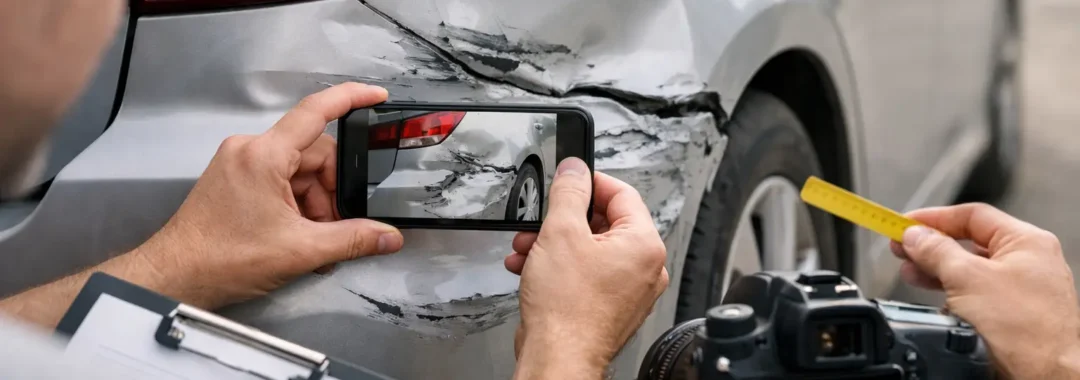
A tiny scratch can be easy to miss in a busy collection bay, especially when you are loading bags, organising the kids or trying to get out of the airport. Knowing how to photograph vehicle damage properly gives you a clear record of the car’s condition before you drive away. It takes only a few minutes, costs nothing and can save a lot of uncertainty later.
This is useful whether you are hiring a compact car for a Sydney weekend, a seven-seat SUV for family travel, or a ute or moving van for the day. Good photos are not about trying to prove someone wrong. They help everyone work from the same clear information.
Why vehicle damage photos matter
Rental vehicles do plenty of kilometres, and minor marks can happen: a light scuff on a bumper, stone chips on the bonnet, a scrape on an alloy wheel or a small mark inside the boot. The condition report should identify existing damage, but photographs give you an extra time-stamped visual record.
Photos are particularly helpful when a mark is small, when lighting makes it difficult to see, or when the vehicle is collected or returned after hours. They can also help you explain a new incident accurately if something happens during your hire.
Your mobile is usually all you need. Modern phones capture enough detail for this job, provided the lens is clean and you take the photos in a sensible order. Do not rely on one quick snap from several metres away. A useful record needs context as well as close detail.
How to photograph vehicle damage before you leave
Start your inspection before putting luggage in the car or pulling out of the collection area. If possible, park or stand where there is good light. Avoid taking every photo with strong sun directly behind the vehicle, as glare can hide dents and scratches.
Wipe your phone lens first. It sounds basic, but fingerprints and dust can make close-up photos useless. Keep your phone’s date and time settings accurate, and do not use filters, portrait mode or editing tools. The original image is the most useful version.
Take a complete walk-around first
Walk around the vehicle slowly and compare what you see with the condition report. Check the front and rear bumpers, both sides, doors, mirrors, wheels, windscreen, windows, roof, bonnet and boot. On a van or ute, inspect the tray, tailgate and loading areas too.
Take wide photos of each side of the vehicle, even if it looks perfect. These establish the overall condition and make it easier to show where a close-up image was taken. Include the number plate in at least one wide shot where practical, but you do not need to make it visible in every photo.
A short walk-around video can be a handy backup, especially when collecting after hours. Move slowly, keep the vehicle in frame and pause at any existing mark. Still photos remain essential, though, because they are easier to inspect closely and share if needed.
Use wide, medium and close-up photos
For every existing mark you find, take three types of photo. First, take a wide image showing the whole section of the car, such as the entire passenger-side door. Next, take a medium shot that shows the damage in relation to a feature like a handle, wheel arch or tail-light. Finally, take a close-up image that captures the scratch, dent or crack clearly.
This sequence matters. A close-up of a grey scratch may show its texture, but without a wider shot it can be hard to tell which panel it is on. Taking both views removes the guesswork.
Try photographs from more than one angle if a mark is difficult to see. A shallow angle often reveals dents, ripples and paint transfer better than a straight-on shot. For scratches, take one image with sunlight or overhead light across the panel, then another from a slightly different position.
If you need a sense of scale, hold a coin, key or tape measure nearby without covering any part of the damage. This can be useful for a chip or small crack, but do not place objects against fresh damage that could make it worse.
Do not forget the areas people overlook
Most people remember the doors and bumpers. The missed areas are often wheels, tyres, mirrors and glass. Photograph each alloy wheel face and the sidewall of each tyre, especially if there are existing kerb marks. Check the windscreen for chips and cracks, including near the edges where damage can be less obvious.
Inside the vehicle, take a few general photos of the front seats, rear seats, dashboard and boot or cargo area. This is more relevant for a van, ute or family SUV, where there may be previous wear in the loading space. If the vehicle comes with accessories such as child-seat anchor points, a cargo cover or charging cables, a quick photo can confirm their condition at collection.
What to do if you spot unrecorded damage
If you find damage that is not shown on the condition report, raise it before you leave the location. Take your photos first, then speak to the rental team and ask for the item to be noted. A clear photo and an early conversation are far better than trying to recall details at the end of a hire.
Do not assume a mark is too small to mention. A tiny chip may be harmless, but it is still worth recording if you noticed it. At the same time, avoid making your inspection stressful. The aim is a practical check, not a forensic examination of every panel.
If you collect after hours and cannot speak with someone immediately, take clear images and contact the rental provider as soon as their team is available. Keep the original files on your phone and back them up if you are travelling or short on storage.
Photographing damage after an incident
If damage occurs during your hire, put safety first. Stop in a safe place where possible, check whether anyone needs help and follow the relevant road rules. If another vehicle, person or property is involved, exchange the required details and contact emergency services when the situation calls for it.
Once it is safe, photograph the scene before vehicles are moved, if practical. Capture the vehicle positions, number plates, surrounding road markings, signs, weather and any relevant obstacles. Then photograph each damaged area using the same wide, medium and close-up approach.
Take notes while the details are fresh. Record the date, time, suburb or street, what happened and the contact details of anyone involved or anyone who witnessed the incident. Your photos should support those notes, not replace them.
Contact the rental provider promptly and follow the process in your rental agreement. Do not attempt a repair yourself, even if the damage seems minor. A temporary fix can make a proper assessment harder and may create more problems than it solves.
Common photo mistakes to avoid
The biggest mistake is taking only one blurry close-up. It may show a scratch, but not its location or size. Another common issue is using flash at night, which can create glare on paintwork and glass. If lighting is poor, take several photos from different angles and use available overhead lighting where it is safe to do so.
Avoid deleting images because they look repetitive. Two near-identical shots can differ in focus or glare, and the extra image may be the clearer one later. Keep your originals until the hire is fully finalised.
It is also wise not to rely solely on a video. Videos can be difficult to pause at the right frame, and movement can blur fine details. Use video as a supplement to still images, not as your only record.
Take another check before returning the car
Before return, give the vehicle a quick walk-around in daylight if you can. Check for new marks, remove personal belongings and photograph the exterior, interior and fuel gauge where relevant. This is especially helpful for after-hours drop-offs, as it records the vehicle condition when you left it.
If you are unsure whether something was already there or have noticed a new issue, be upfront. A friendly call to the rental team early is usually much easier than leaving questions until later. At Low Cost Car Rental, asking for clarification before you leave is always the sensible option.
A careful set of photos is one of the simplest ways to make car hire feel more straightforward. Take your time at collection, keep the originals and speak up when something does not look right. That small bit of preparation lets you get on with the trip, move or family plans that made you hire the vehicle in the first place.
